
Buy the upgrade that changes the reason your last run stalled. If the screen is mostly empty, inspect object-supply upgrades. If objects are nearby but you miss them, inspect movement and collection-related choices. A long branch with an impressive icon is not automatically the best next purchase.
The early browser demo and Steam preview have different progression screens. This guide separates the directly observed first-demo upgrade from the larger tree shown on Steam. It is a decision guide, not a completed list of every node or a fixed purchase order for the full release.
The first demo upgrade is an object-supply upgrade
On a fresh early-browser-demo save, the first available node showed “Increase amount of Pebbles spawned,” 10 → 25, $1. Three nearby nodes were locked. The immediate question is therefore whether you can earn the purchase price and whether the shortage of small objects is holding back your attempt.
This example matters because it distinguishes the upgrade's stated effect from several things it does not claim. It increases the amount of Pebbles spawned. Its tooltip does not say that it extends Hunger, changes the hole's movement, or increases the collection radius. Do not use the larger number as proof that all those properties improve together.
If you have not collected anything yet, first try earning some money in a short run. The demo result screen provides a New Run button alongside Upgrades; you do not need to erase the save to repeat an attempt. After earning the required amount, revisit the node and read the current tooltip before purchasing. The $1 example belongs to the early build and may differ in Steam.
Find the constraint before choosing a branch
Separate three common situations. Supply is about having suitable objects available. Movement is about reaching them. Collection range is about how close you must get for the objects to be taken in. A change to one of these can leave the others untouched, and a card can even improve one while reducing another.
| Your current constraint | What to look for in the tooltip | What would count as improvement |
|---|---|---|
| Too few small objects near the hole | A stated increase in object amount or spawning | More suitable objects available during the opening |
| Too much of the attempt spent travelling | A stated movement-related effect | Reaching the useful patch before Hunger empties |
| Repeated near misses | A stated range or collection-related effect | Collecting objects without passing as precisely over them |
| A locked progression branch | The connected prerequisite and its requirement | The next node becomes available after satisfying that requirement |
| An affordable purchase gives little visible benefit | The exact property the purchase changes | A change in that property, rather than a different bar or statistic |
The entries above are comparisons to make in your own tree. They are not claims that every described effect has a particular node name, location, or price. The tree's tooltips are the place to confirm the exact purchase available to you.
Navigate the larger Steam tree
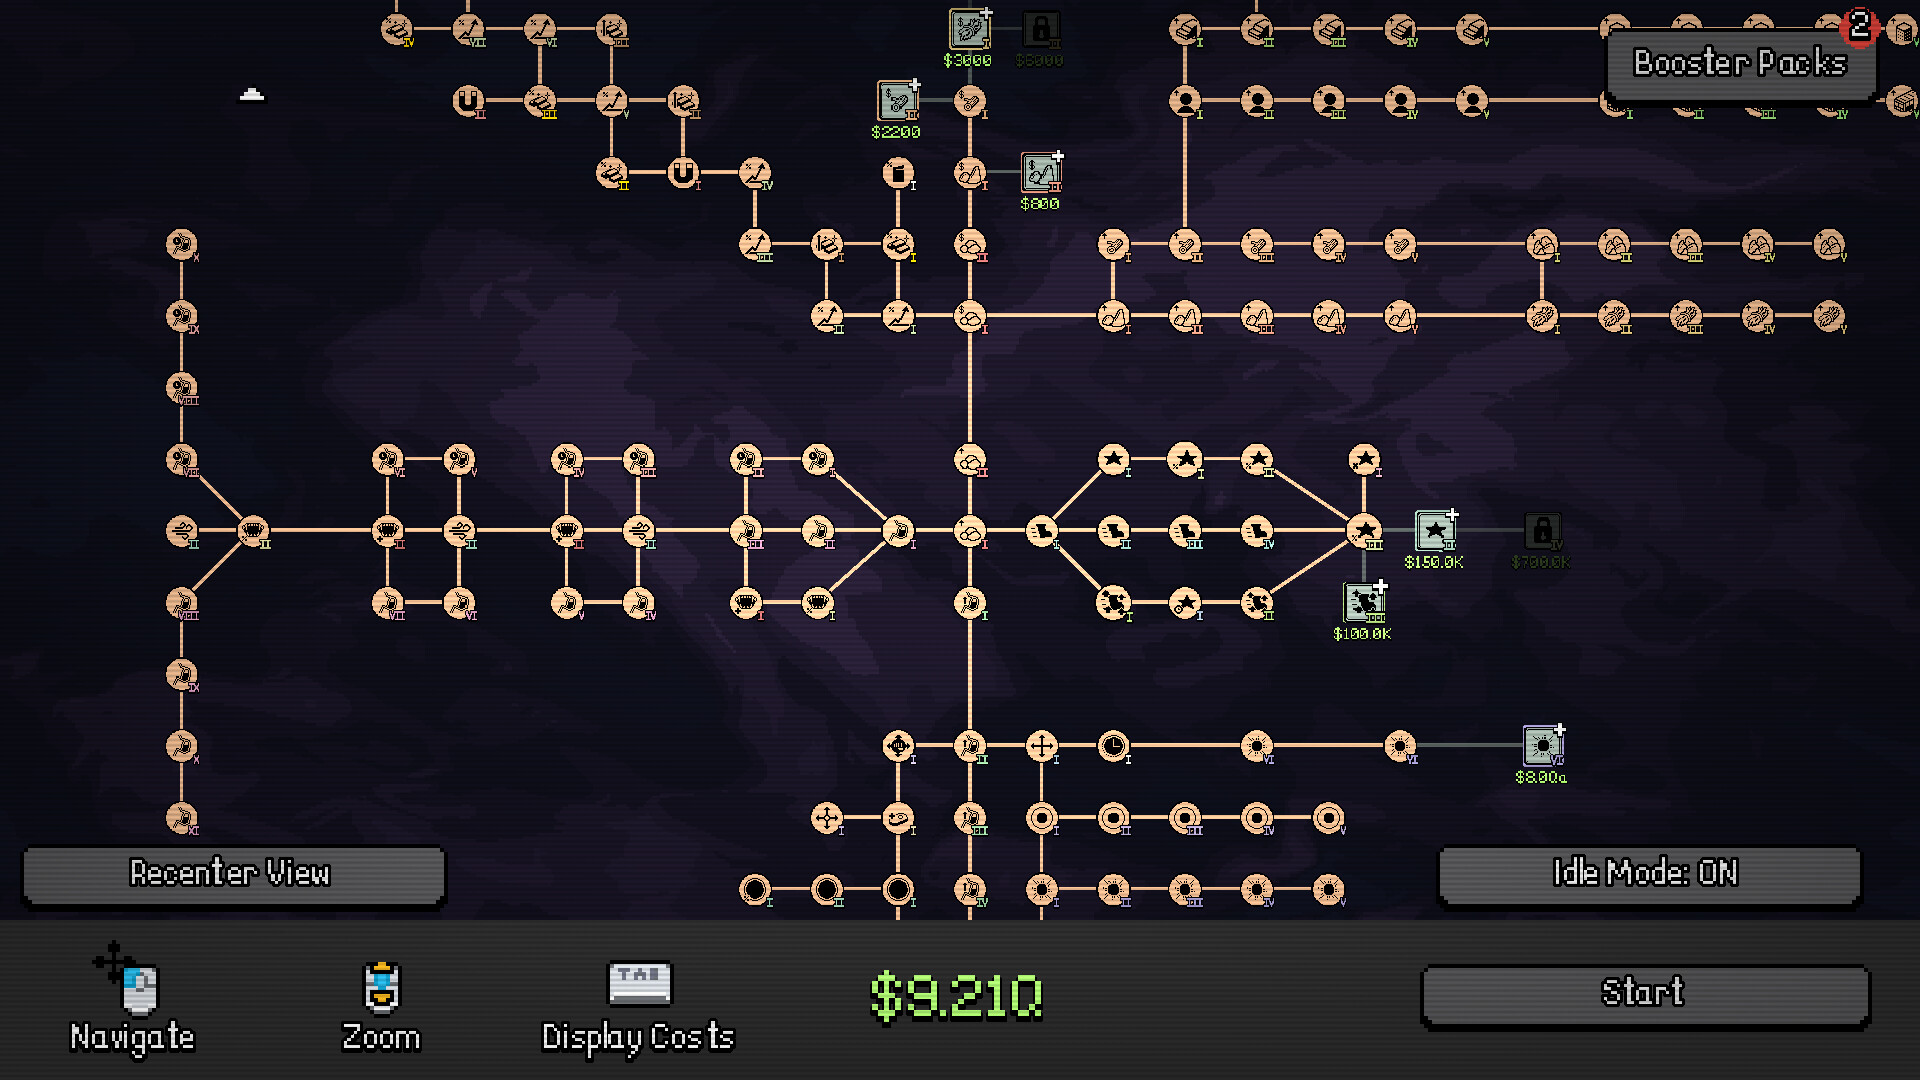
The official Steam preview shows a connected tree with multiple branches and repeated node ranks. Its bottom bar labels Navigate, Zoom, and Display Costs. It also includes Recenter View, Start, and a button labelled Idle Mode: ON in the pictured state.
Start by locating your current branch. Use the navigation and zoom controls shown by your build to inspect the nodes around it; do not assume that an icon elsewhere on the large tree can be bought immediately. Read the intervening connections and locked requirements. If you lose your position while browsing, the preview's Recenter View control is a useful landmark to look for.
Compare the next reachable purchases, rather than comparing a cheap opening upgrade with an unreachable late-game one. Where your version offers Display Costs, use it to keep the purchase decision tied to your current funds. The money totals and prices in promotional screenshots show one particular game state, not a universal budget or unlock threshold.
Compare one purchase at a time
Before spending, note the symptom, the chosen node, and the outcome you expect. For example: “I keep crossing empty space; this node increases Pebbles; I expect the next opening to offer more small targets.” That expectation is much more useful than “this branch must be the strongest.”
Run again with the same broad approach. Did the promised property improve? Did the original symptom remain? If both answers are yes, the purchase can have worked while another constraint still limits the run. More targets will not necessarily compensate for missing the available objects, and greater movement speed may not help if collection range becomes harder to use.
Avoid judging a purchase from a single unusually good or bad attempt. Look at a few runs, while keeping the other choices as similar as possible. The goal is a repeatable improvement in your own play, not matching the cash total or Size shown in someone else's screenshot. This also gives you a reason to change branches: a repeated symptom is more informative than the visual size of the tree.
Check card penalties before buying around them
If your version includes Booster Packs, read the equipped card descriptions before blaming the base upgrade tree. The official Hypersonic preview shows a speed bonus alongside a Suction Range penalty. A card choice can therefore change the problem you need to solve, even when the underlying tree is unchanged.
Do not automatically spend money compensating for a card whose tradeoff you do not want. Inspect the card and your available choices first. Our Booster Pack guide uses that specific example to explain why rarity alone is a poor way to choose a build.
What this guide does not turn into a fixed build
The full tree's complete node names, current costs, prerequisite chain, and strongest late-game order are not established by the store preview. The developer's early demo also explicitly differs from the final version. Follow your current tooltip when it disagrees with an old screenshot, and avoid carrying the browser demo's opening numbers into a Steam late-game plan.
For help reading Hunger and the result screen, return to the first-run guide.
Sources: developer's browser demo and official Steam screenshots and description.