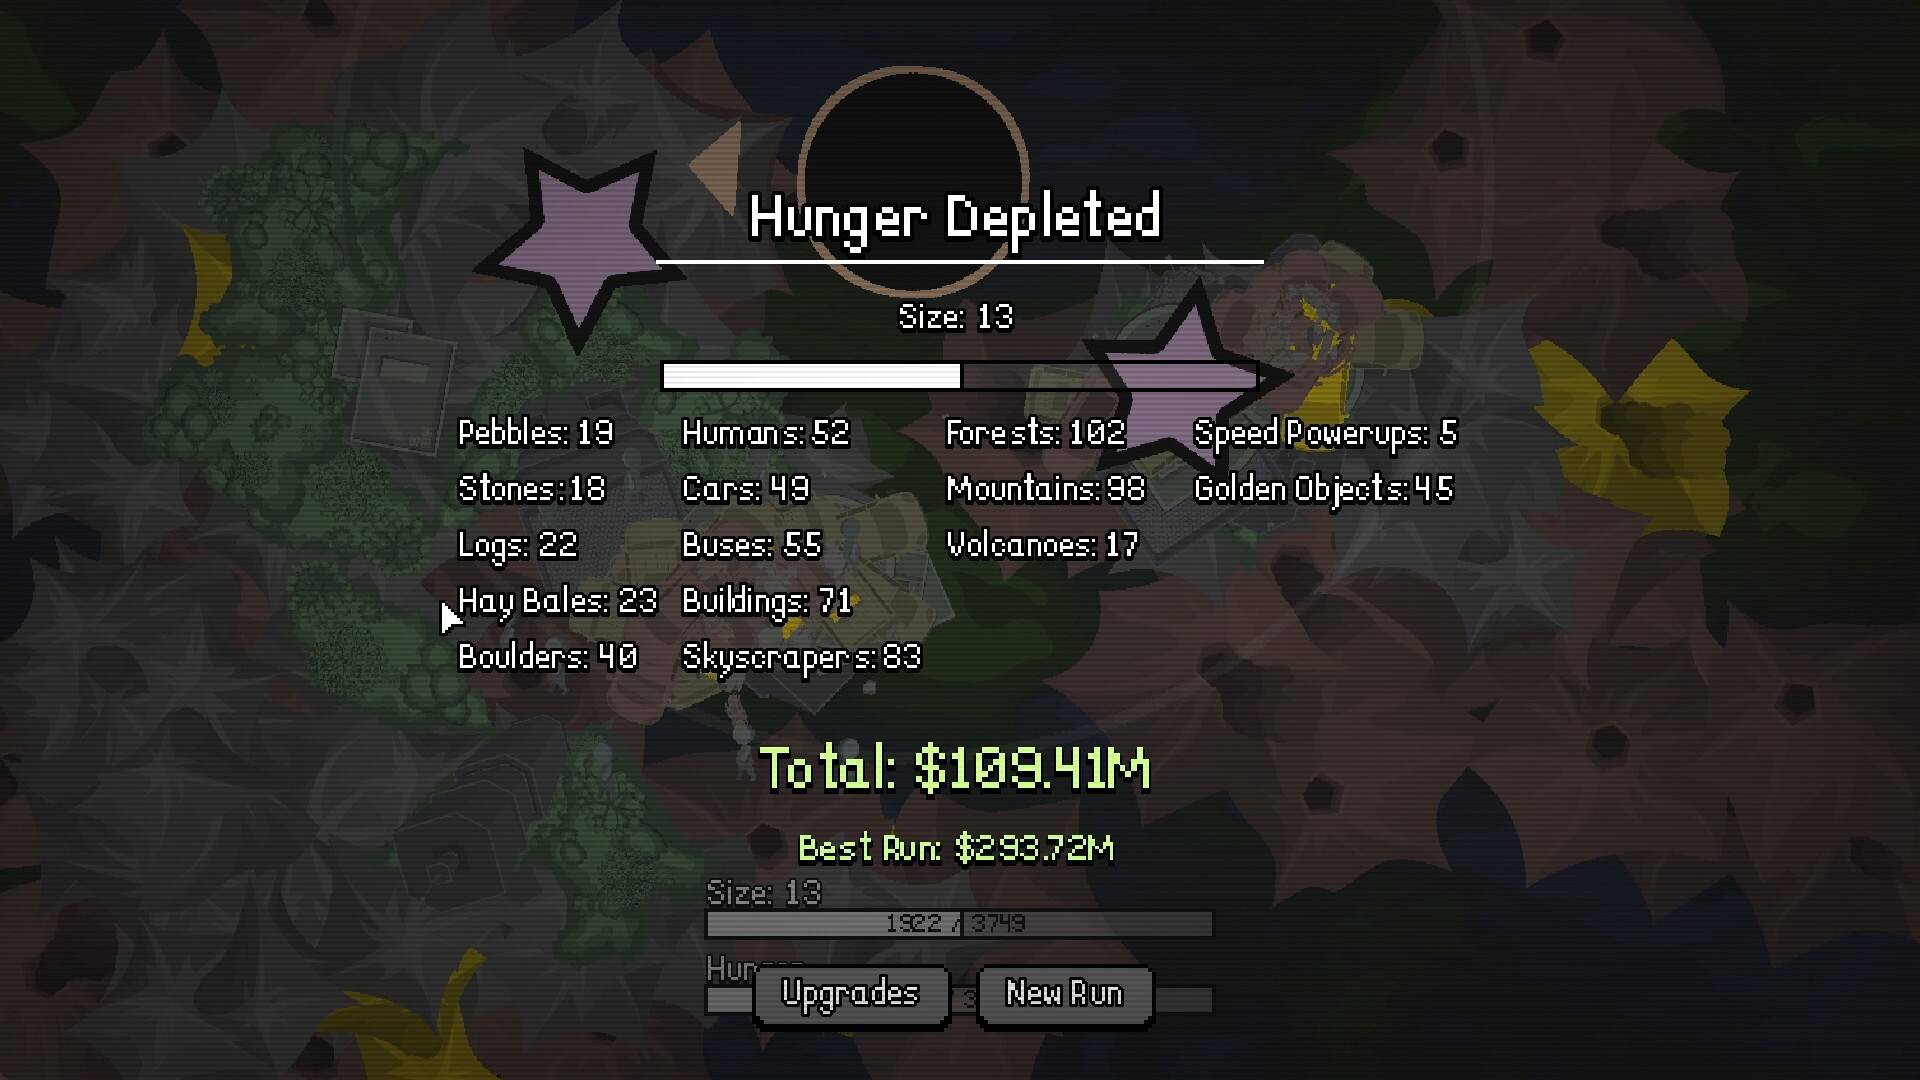
Use the end-of-run object list to see what your hole actually collected. The Steam preview's Hunger Depleted screen shows named object counts, Total and Best Run. A crowded screen during play is a visual impression; the collection list is a much more concrete record of that attempt.
This is a reading guide to the visible result screen, not a complete 25-tier database. The preview does not establish each object's unlock Size, spawn area or individual cash value. The counts and money in the pictured attempt belong to that attempt; they are not fixed rewards for completing a stage.
Objects named on the preview result screen
| Visible group | Names shown |
|---|---|
| Smaller ground objects | Pebbles, Stones, Logs, Hay Bales, Boulders |
| Human-scale objects | Humans, Cars, Buses, Buildings, Skyscrapers |
| Larger landscape objects | Forests, Mountains, Volcanoes |
| Special collection entries | Speed Powerups, Golden Objects |
These group labels make the list easier to read; they are not quoted in-game categories. The screen visibly names thirteen ordinary objects and two special entries. The full game's advertised 25 increasing object sizes should not be reduced to this one screenshot, and the two special entries should not automatically be counted as two extra Size tiers.
A count is not a price
The number next to Pebbles or Buildings is a collected quantity in the shown result. It does not state how much each unit pays. Dividing Total by the combined count would mix different objects and special effects, so it would not establish a trustworthy per-object value.
Similarly, a Golden Objects count is not proof of a multiplier, spawn chance or drop rate. The name suggests a distinct entry, but the screenshot does not display its underlying formula. Check current in-game descriptions before building a strategy around a numerical bonus that is not shown.
If your goal is to compare two purchases, use attempts with a similar approach. Note which kinds of objects increased and whether Total improved. That will not reveal the full economy, but it can tell you whether the purchase changed the part of the run you intended to improve.
Read Total and Best Run separately
The Steam preview displays both Total and Best Run. The developer's early-demo update also explicitly added a Best Run score to the end screen. Read the current attempt first, then compare the best score as a separate reference. Do not assume every figure on this screen is your spendable balance or your lifetime collection total.
In our opening browser-demo attempt, Total and Best Run both showed $0. That was an unsuccessful first run, not a statement that the game never pays money. By contrast, the Steam preview shows a much later attempt with many object entries. The two screens illustrate different progression states and different editions.
Before deciding that progress was lost, return through the normal Upgrades button and inspect the actual progression screen. A lower current result than the best result does not by itself show that the best score was overwritten.
Turn the collection list into your next decision
If small-object counts remain very low, watch your opening movement and suitable nearby objects. If counts rise but you spend much of the attempt crossing empty space, inspect supply and travel separately. If the list broadens into larger objects but earnings remain inconsistent, compare the actual result rather than the scale of the art.
The result screen gives a direction for investigation, not an automatic shopping list. Use the upgrade guide to identify what the next tooltip actually changes. Then change one purchase and compare another attempt. Buying several branches at once makes it harder to tell which change mattered.
For repeated Hunger endings, start with the beginner run loop. For questions about the difference between five areas and 25 object sizes, use the area overview. Neither a result count nor an area name alone establishes the exact unlock condition of the next object.
Source: the official Steam screenshots and the developer's Best Run update.