If your first run ends almost immediately, read the Hunger bar before assuming the game is broken. In the early browser demo, reaching zero Hunger brings up the “Hunger Depleted” result screen. That screen offers both Upgrades and New Run. A short attempt is part of the opening loop, rather than a permanent loss of your entire playthrough.
This guide covers the early browser demo and the mechanics visible in the Steam preview. The developer explicitly says the browser build does not represent the final game. Use the names and values in your own build when they differ; the example below is an opening-demo example, not a full-release balance table.
Read the two bars separately
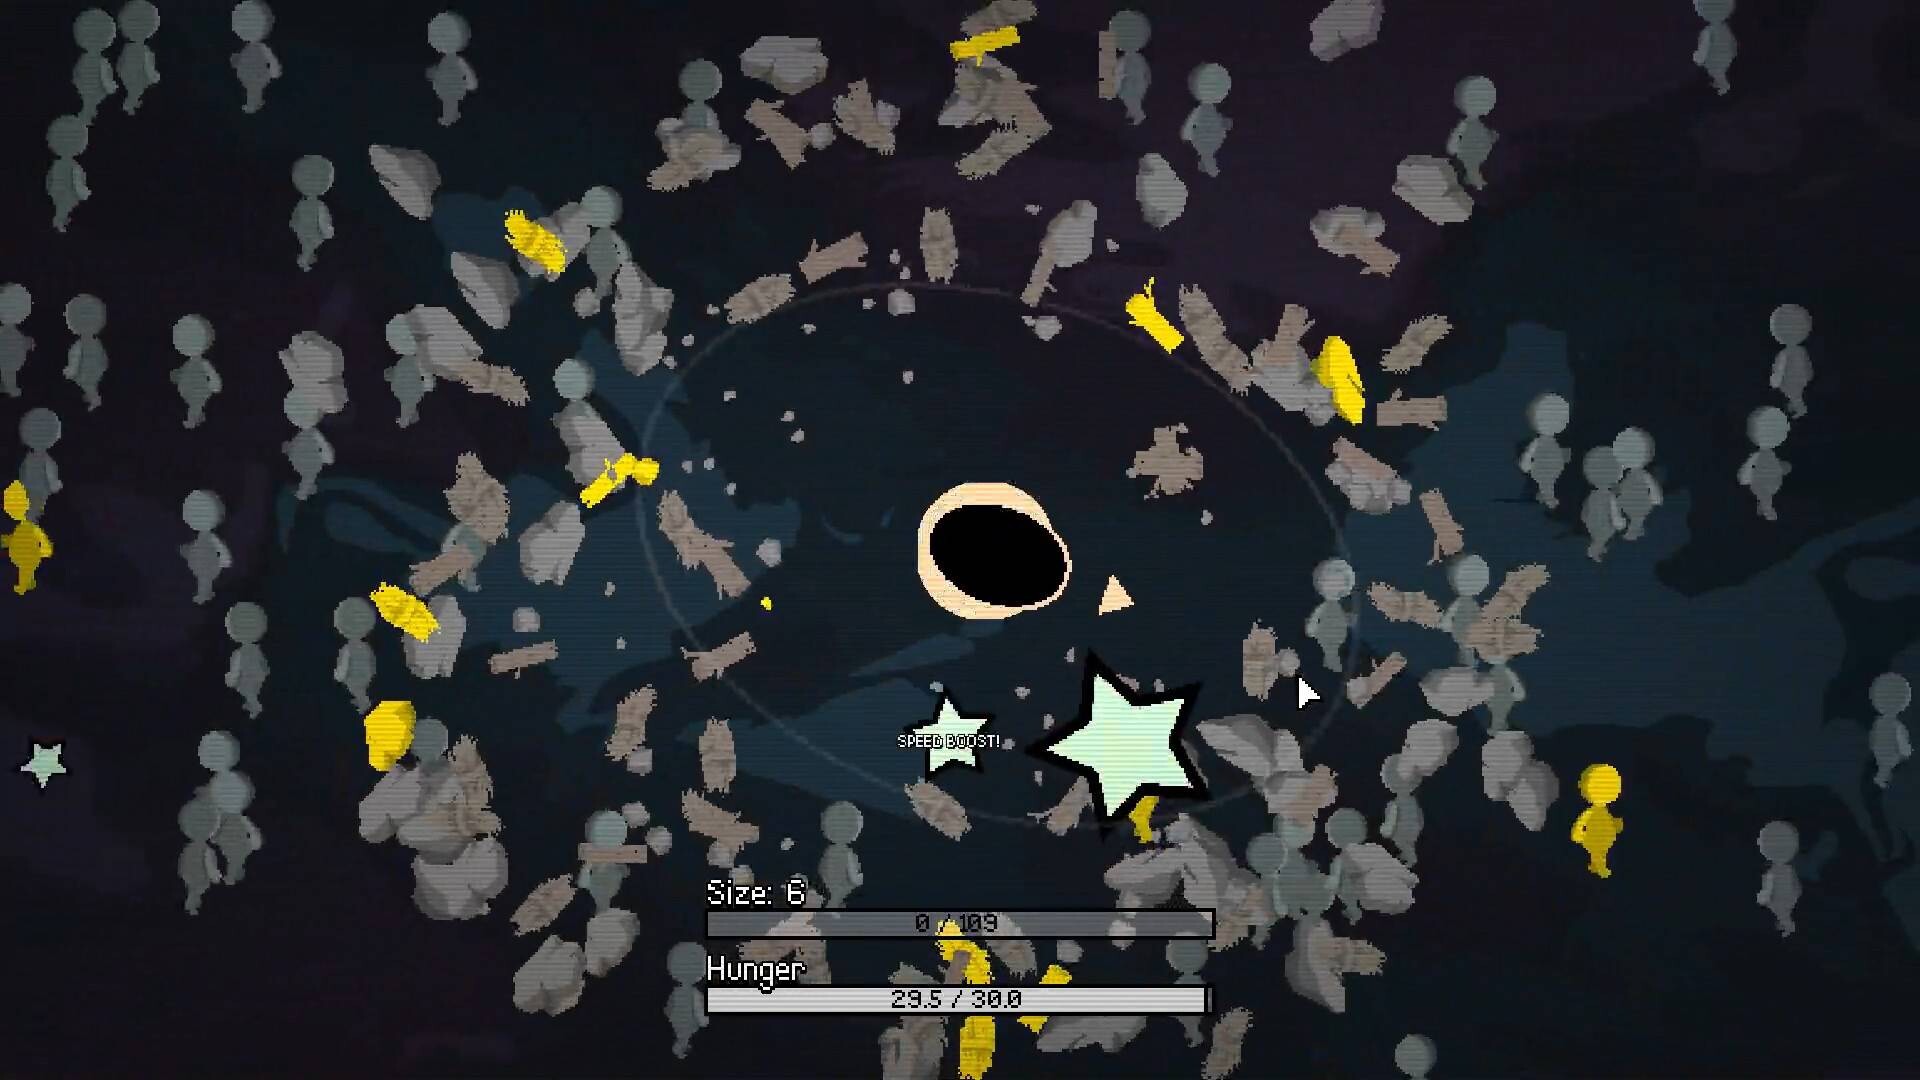
The run HUD puts Size above the first progress bar and Hunger above the second. They answer different questions. Size tells you how far your hole has grown; Hunger tells you how close the current attempt is to ending. Do not read a full-looking growth bar as a guarantee that the run still has plenty of time.
In our fresh browser-demo attempt, the HUD showed Size 1, growth of 0 / 5, and Hunger of 5.0 / 5.0. After the Hunger bar emptied, the result screen showed Size 1, Total $0, and Best Run $0. Those numbers describe that particular unsuccessful attempt. They are useful for recognizing the screens, but they are not targets you must reproduce or values to expect in every edition.
Try an opening run with one simple objective: collect something and notice how the bars respond. Keep your attention on the nearest objects rather than on everything moving around the screen. If an object does not disappear into the hole, do not keep chasing that same object for the whole attempt. Compare it with a smaller nearby object, and check whether you are actually reaching it before the Hunger bar empties.
Use the result screen as a diagnosis
The result screen is a place to decide what to change. New Run starts another attempt. Upgrades takes you back to the progression choices. If you earned nothing, you do not yet have evidence that an expensive upgrade is the solution: first check your movement and what you were trying to collect.
| What you noticed | What to check next | A useful next attempt |
|---|---|---|
| Hunger reached zero before you collected anything | Whether you reached an available small object | Aim at one nearby object instead of sweeping across the whole screen |
| You spent most of the run crossing empty space | Object availability versus travel distance | Look for a denser patch, then inspect object-spawn upgrades |
| You passed close to objects but missed them | Your movement and collection range | Use shorter movements and compare your current range-related choices |
| You collected regularly but growth still stalled | The growth requirement and next affordable upgrade | Compare the specific upgrade tooltip rather than buying an unrelated branch |
| The scene became crowded or difficult to read | Performance and the size of your movements | Check the on-screen bars and result screen instead of guessing from the visual pileup |
This is a way to choose a test, not a promise that one purchase fixes every short run. More objects, faster movement, and a larger collection range address different constraints. The upgrade guide explains how to tell them apart.
Move from a short run to a useful purchase
Before pressing New Run again, pick one thing to learn. You might want to know whether a nearby object can be collected, whether a longer trip wastes most of the attempt, or whether you can earn enough for the first visible upgrade. Changing one thing makes the result easier to interpret.
Once a purchase becomes affordable, read its full description. The first highlighted upgrade in the early browser demo says “Increase amount of Pebbles spawned,” with an example change from 10 to 25 and a $1 price. That is an object-supply upgrade. It is not described as extra Hunger, extra movement speed, or extra collection range. Treating all upgrades as interchangeable makes the opening feel more confusing than it needs to be.
After buying something, start another run and compare it with the previous attempt. Look for the improvement the tooltip actually promised. For an object-supply purchase, that means noticing whether there are more suitable objects available, rather than expecting the Hunger timer itself to change. A disappointing result can still tell you that a different part of the run needs attention.
The five areas of the full game
The developer lists five areas: Surface, Civilization, Continental, Cosmic, and Universe. The Steam description also lists 25 objects of increasing sizes and gives the full game's playtime as roughly two hours or more. The browser-demo ending and its much shorter play sessions should not be used as the full-game completion time.
Use the area names as a broad progression checklist. They do not supply the exact upgrade cost, size requirement, or unlock condition for each transition. If you cannot reach a new area, inspect the nearby tree connections and the next in-game requirement instead of assuming there is a separate map-selection menu or an undisclosed code.
The personal checklist below lets you mark areas as you finish them. It saves in this browser only; it does not unlock areas, read the game save, or transfer progress into Steam.
Where to go next
For a run that has plenty of objects but still feels ineffective, work through what to upgrade next. If you are choosing cards in the Steam version, read the Booster Pack tradeoffs before assuming a higher rarity automatically improves the run.
Sources: developer's early browser demo, official Steam game page, and player discussion about short demo runs.
Your area checklist
Mark areas as you finish them. This is a personal checklist, separate from the game save.